Week 7 Weekly Challenge:
Twofold!
1. a) Self portrait or b) Abstract
2. your favorite photo(s) you’ve ever taken
There are some cool examples of self portraits here, and some examples of abstract here. with abstract, try to take a photo of something so that we can't tell what the original object was - whether that's getting in real close in a macro setting or cropping out parts of the subject.
We also talked about the blogger behind Mila's daydream, who sets up elaborate scenes on the floor of her sleeping baby.
How are your final projects going? Nial has a blog that he's started.
I love this dear photograph idea, where you take an old photograph, go back to where it was originally taken and superimpose the photo on the existing scene.
Next week is our last official meeting. If any of you are interested, we can meet once every 4-6 weeks to keep in touch and share photos, and I'm still happy to send out weekly challenges to tackle.
Friday, March 30, 2012
landscape photography tips
Landscape photography tips:
1. Use a small aperture (a large fstop) to get a large depth of field.
2. Use a tripod because you will probably need a slow shutter speed to make up for your large fstop
3. Incorporate a focal point
4. Get low to incorporate a focal point in the foreground
5. If the sky is nice, incorporate more sky. If it is overcast and uninteresting, don’t let it dominate the photo
6. Incorporate leading lines for depth, scale, interest
7. Capture movement with a slow shutter speed (waterfalls, swaying trees)
8. Consider the weather
9. Shoot in the golden hours: dawn or dusk
10. Consider the horizon: don’t take a crooked photo, position it on the rule of thirds or in the center
11. Choose your vantage point carefully: get low, or get high
Monday, March 26, 2012
week 6 challenge: wide angle + foreground
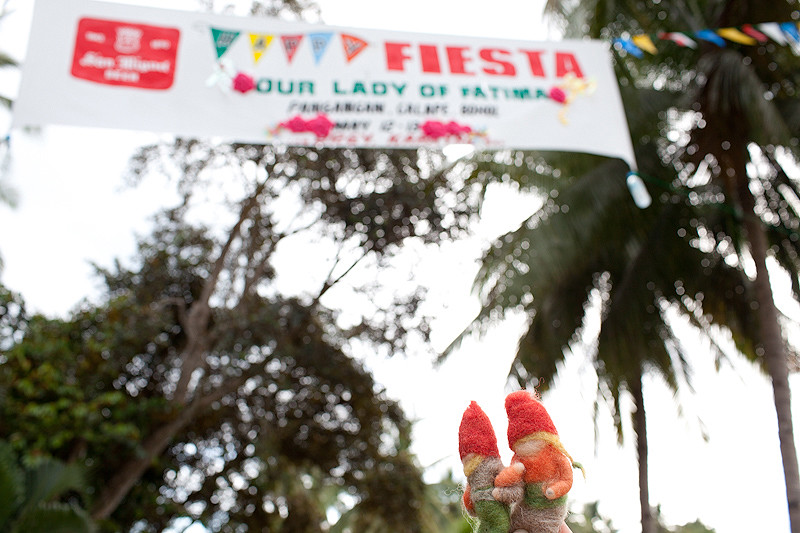
Week 6 Challenge: use a wide angle lens to emphasize something in the foreground. I personally don't have any great examples of this, but there are some great examples here

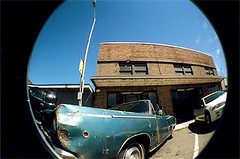
When we think wide angle, we typically think "landscape," however, if you do choose to take a landscape photo, try to put something in the foreground to make it interesting. (the photo above does not have anything in particular in the foreground). If it is a landscape, make sure to focus on the object in the foreground, and use a high f-stop number (like f8, f16, f32) so that the background can also be relatively clear.
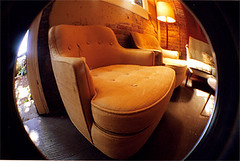
This photo and the next photo are the opposite of what I've just laid out, wide angle but with a low f-stop, which has created a blurred background:
To shoot wide angle with any camera:
a) use your point and shoot at its widest setting
b) put a zoom lens on your camera and zoom out all the way to use the widest setting (ie 18-55mm use 18mm)
c) attach a wide angle prime lens or fisheye
Ultra-wide lenses exaggerate depth of field and create distortion; unless the horizon is dead center, vertical lines like buildings or trees will converge. Try shooting from high above, try shooting from down low and see what difference it makes
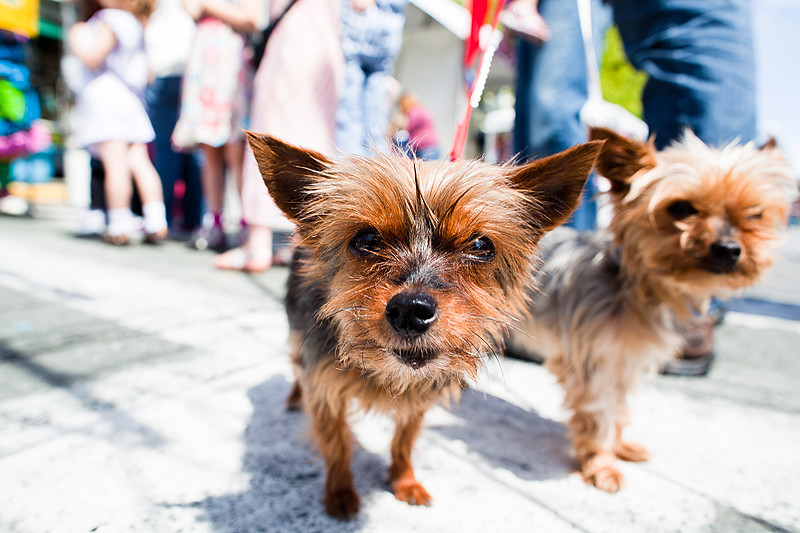
this was taken with my 24mm lens way down on the ground. get close!
When we think wide angle, we typically think "landscape," however, if you do choose to take a landscape photo, try to put something in the foreground to make it interesting. (the photo above does not have anything in particular in the foreground). If it is a landscape, make sure to focus on the object in the foreground, and use a high f-stop number (like f8, f16, f32) so that the background can also be relatively clear.
This photo and the next photo are the opposite of what I've just laid out, wide angle but with a low f-stop, which has created a blurred background:
To shoot wide angle with any camera:
a) use your point and shoot at its widest setting
b) put a zoom lens on your camera and zoom out all the way to use the widest setting (ie 18-55mm use 18mm)
c) attach a wide angle prime lens or fisheye
Ultra-wide lenses exaggerate depth of field and create distortion; unless the horizon is dead center, vertical lines like buildings or trees will converge. Try shooting from high above, try shooting from down low and see what difference it makes
this was taken with my 24mm lens way down on the ground. get close!
Photo tip of the week: Create a “reset routine.”
Photo tip of the week: Create a “reset routine.”
Do you reset your cameras at the end of a shoot? Do you double check your settings when you begin a shoot? Do you do one or the other, or both?
Some cameras have a reset default factory settings option.
Maybe you want to reset to something like shutter priority (S), 1/160th of a second, ISO 400, exposure compensation 0, AWB, evaluative metering, JPG. Even easier, set the dial to program mode (P). Know that the easiest thing to adjust in the moment is your ISO – if it’s dark, remember to bump up your ISO.
This way if you need to quickly grab a shot, you can.
lenses
Relative to zoom lenses, prime lenses are lighter, can produce crisper images, create more bokeh and background blurring, and are more usable in low light. A $200 prime can often produce a better image than a $1000 zoom. Here's a list of pricing betwen canon and nikon, notice how canon is always a little bit more affordable.
Primes
Canon 50mm f/1.8 II ~$125
Nikon 50mm f/1.8 AF-S ~$220
Nikon 35mm f/1.8 AF-S ~$199
Canon 35mm f/2 $329
Canon 35mm f/1.4L $1379
Nikon 35mm f/1.4 G AF-S $1649
Canon 85mm f/1.8 $419
Nikon 85mm f/1.8 $499
Zooms:
Canon 18mm-200mm f/3.5-5.6 $699
Nikon 18mm-200mm f/3.5-5.6 $846
Primes
Canon 50mm f/1.8 II ~$125
Nikon 50mm f/1.8 AF-S ~$220
Nikon 35mm f/1.8 AF-S ~$199
Canon 35mm f/2 $329
Canon 35mm f/1.4L $1379
Nikon 35mm f/1.4 G AF-S $1649
Canon 85mm f/1.8 $419
Nikon 85mm f/1.8 $499
Zooms:
Canon 18mm-200mm f/3.5-5.6 $699
Nikon 18mm-200mm f/3.5-5.6 $846
Saturday, March 17, 2012
week 5: collage or curves
Weekly Challenge 5: a) create a photo mosaic or (if you don't have photoshop) b) a picture that represents "curves"
Nial had some great photos from near the locks this week that represent curves:

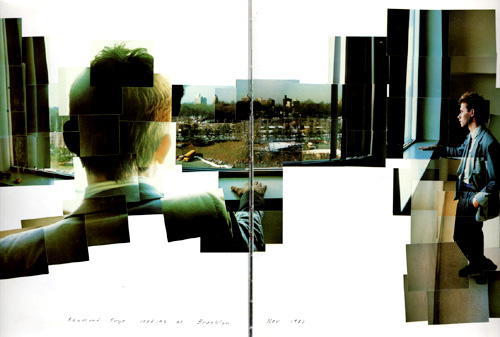
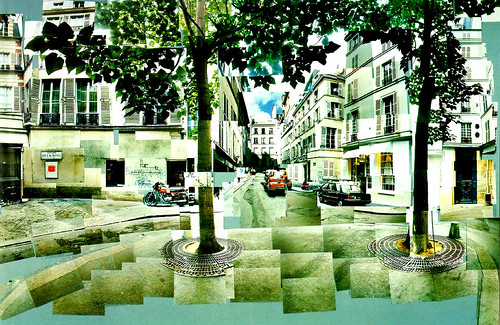
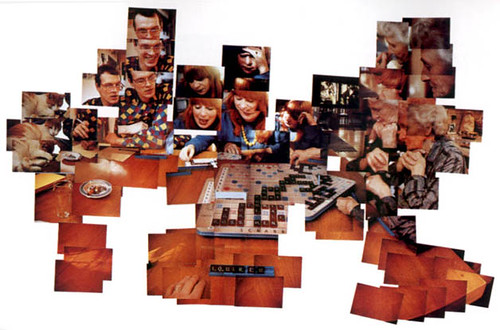
the images below are from david hockney. google images has a good collection of examples of hockney-style collages. the last photo of the scrabble game shows the passage of time. you could shoot a static scene and transpose depth onto a 2D plane, or you could try to convey movement or the passage of time. try to shoot at least 12 images to piece together in photoshop or a similar program where you can layer images. you could even print the photos as 4x6 prints or smaller and join them together yourself. if you can, find the ideal exposure (figure out how to set the iso, shutter speed, f-stop) and shoot in manual so that some photos don't look dark while others look light. you could take photos of a room in your house, of a large open space, etc etc. a wide angle lens will probably not work well for this, so try to use something anywhere from 50mm-200mm to take the photos.
On friday we discussed post processing. You can download a 30 day trial of the new lightroom 4 or buy an older version for anywhere from $79.99 to $110 from amazon.com. You can also download a free trial of photoshop. For most people in the group, lightroom is all you really need. If your heart is set on photoshop, I think photoshop elements is the way to go for most people, which is a lot cheaper than the full version and would do everything you could probably ever imagine. You can do a lot more adjustments with your photos if you shoot in RAW versus JPG, but RAW will take up a lot more disk space and isn't as convenient to view without something like lightroom.
What I can do in Lightroom and Photoshop:
* Presets/Actions
--you can usually find free actions or trial actions/presets to download (like the totally rad ones here), and here is a link to a video that explains a bit more how to use them
* Adjust tonality
* Adjust white balance (when you take photos inside your house or in a restaurant, the lightbulbs usually cast a yellow glow on your photos, while fluorescent light will usually cast a greenish glow; these color casts can be elimintated)
* Rotate photos
* Dodge and burn
* Small spot corrections
What I can only do in lightroom
* Batch process
* Rename photos
* View and Organize photos
* Nondestructive editing
* Lens corrections
What I can only do in photoshop
* Layers
* Cutting and pasting
* Edit one small part of the photo
* Stitching photos together
Nial had some great photos from near the locks this week that represent curves:
the images below are from david hockney. google images has a good collection of examples of hockney-style collages. the last photo of the scrabble game shows the passage of time. you could shoot a static scene and transpose depth onto a 2D plane, or you could try to convey movement or the passage of time. try to shoot at least 12 images to piece together in photoshop or a similar program where you can layer images. you could even print the photos as 4x6 prints or smaller and join them together yourself. if you can, find the ideal exposure (figure out how to set the iso, shutter speed, f-stop) and shoot in manual so that some photos don't look dark while others look light. you could take photos of a room in your house, of a large open space, etc etc. a wide angle lens will probably not work well for this, so try to use something anywhere from 50mm-200mm to take the photos.
On friday we discussed post processing. You can download a 30 day trial of the new lightroom 4 or buy an older version for anywhere from $79.99 to $110 from amazon.com. You can also download a free trial of photoshop. For most people in the group, lightroom is all you really need. If your heart is set on photoshop, I think photoshop elements is the way to go for most people, which is a lot cheaper than the full version and would do everything you could probably ever imagine. You can do a lot more adjustments with your photos if you shoot in RAW versus JPG, but RAW will take up a lot more disk space and isn't as convenient to view without something like lightroom.
What I can do in Lightroom and Photoshop:
* Presets/Actions
--you can usually find free actions or trial actions/presets to download (like the totally rad ones here), and here is a link to a video that explains a bit more how to use them
* Adjust tonality
* Adjust white balance (when you take photos inside your house or in a restaurant, the lightbulbs usually cast a yellow glow on your photos, while fluorescent light will usually cast a greenish glow; these color casts can be elimintated)
* Rotate photos
* Dodge and burn
* Small spot corrections
What I can only do in lightroom
* Batch process
* Rename photos
* View and Organize photos
* Nondestructive editing
* Lens corrections
What I can only do in photoshop
* Layers
* Cutting and pasting
* Edit one small part of the photo
* Stitching photos together
Saturday, March 10, 2012
Weekly Challenge Week 4: a) Banal or b) Minimalist
Weekly Challenge Week 4: a) Banal or b) Minimalist
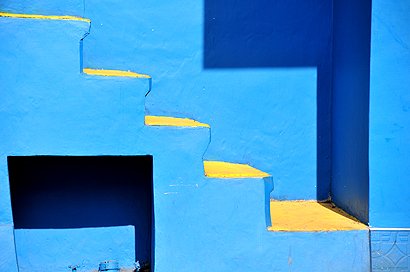
here are some great ideas for minimalist photography. do you need to try taking an aerial shot and shoot directly downward? try to create a large amount of negative space and place your subject matter somewhere interesting in the photo. try to get a clean, uniform backdrop - maybe incorporate much more sky than you normally would.
banal: "commonplace"
ordinary, everyday objects that you wouldn't normally think twice about photographing, like the objects underneath your bed. how can you make it look interesting? do you need get down low?

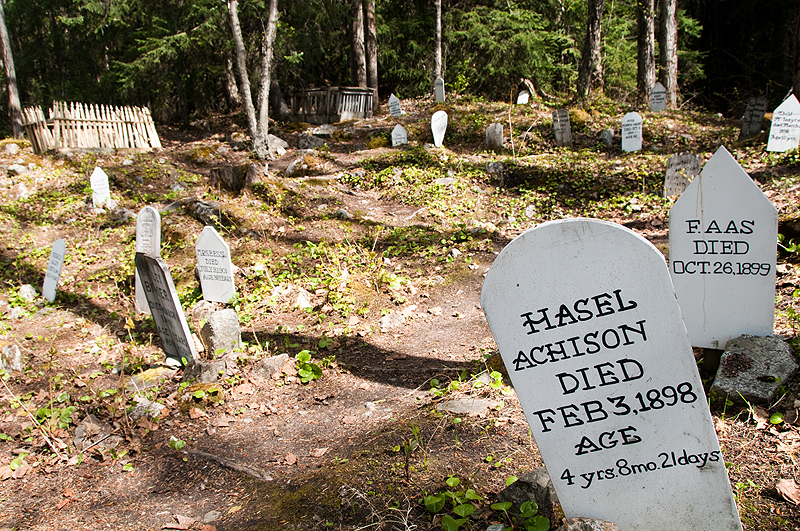
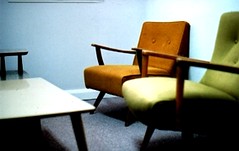
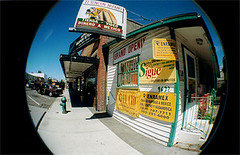
the work of william eggleston has been described as "perfectly banal." he was one of the first photographers to use color in a time when color was not considered an art form but a means for generating family snapshots. to me the word banal evokes a bland mid-century feel, and that was before i even discovered william eggleston last week! here's some shots of mine (the last few were taken with a film fish eye camera but you can still get a feel of the subject matter).
Tips for the week:
1.Always format your memory card with your camera, don’t delete files on the computer, and don’t edit files on the memory card itself. doing so can corrupt the files on the card, and files unreadable or even unwritable with your camera.
2.Rely on your histogram, not your LCD screen. A lot of cameras adjust the brightness depending on the surroundings which doesn’t give an accurate representation of the exposure. Try not to “clip the highlights” – if the histogram is shifted too far to the right, it is overexposed. here is some more information on histograms
here are some great ideas for minimalist photography. do you need to try taking an aerial shot and shoot directly downward? try to create a large amount of negative space and place your subject matter somewhere interesting in the photo. try to get a clean, uniform backdrop - maybe incorporate much more sky than you normally would.
banal: "commonplace"
ordinary, everyday objects that you wouldn't normally think twice about photographing, like the objects underneath your bed. how can you make it look interesting? do you need get down low?
the work of william eggleston has been described as "perfectly banal." he was one of the first photographers to use color in a time when color was not considered an art form but a means for generating family snapshots. to me the word banal evokes a bland mid-century feel, and that was before i even discovered william eggleston last week! here's some shots of mine (the last few were taken with a film fish eye camera but you can still get a feel of the subject matter).
Tips for the week:
1.Always format your memory card with your camera, don’t delete files on the computer, and don’t edit files on the memory card itself. doing so can corrupt the files on the card, and files unreadable or even unwritable with your camera.
2.Rely on your histogram, not your LCD screen. A lot of cameras adjust the brightness depending on the surroundings which doesn’t give an accurate representation of the exposure. Try not to “clip the highlights” – if the histogram is shifted too far to the right, it is overexposed. here is some more information on histograms
Friday, March 2, 2012
week 3 challenge: bokeh or long exposure
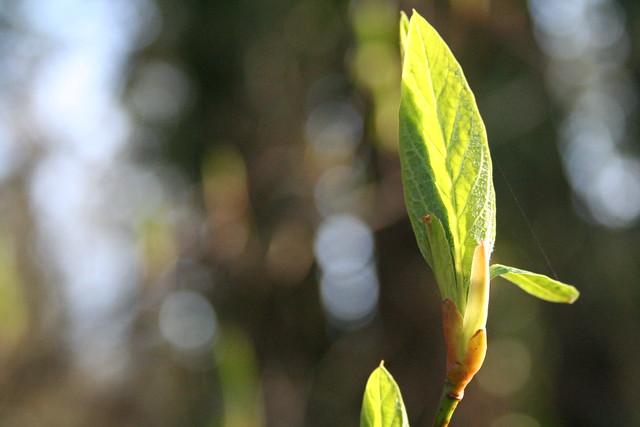
the challenge this week is to take a photo with bokeh (the pretty balls that out-of-focus light sources become at large apertures (low f-stop numbers like f/1.8) - i know a lot of you have "prime" lenses that don't zoom and these are perfect for creating bokeh.
shawna had a great photo this week that demonstrates bokeh:
if you don't have a prime lens, you can do the alternate challenge which is a "long exposure," - or maybe i should have rephrased it to be "motion blur." a long exposure can certainly help you take a properly exposed image in dark situations with static objects, but if you add an element of movement to the image it can create a cool effect - like the fluidity of a waterfall, the movement of car lights at night, etc. It will help to have a tripod or some sort of flat surface to rest the camera on - I never carry a tripod around with me, but I took this shot resting the camera on a ledge.
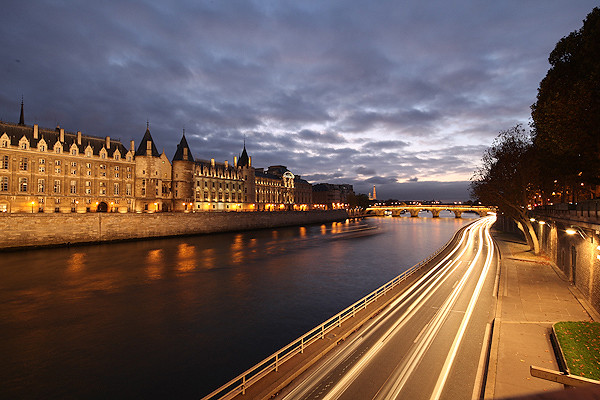
here is some information on how to capture motion blur, including slowing down your shutter speed, stabilizing your camera on a tripod or on a table, choosing shutter priority mode (either "S" or "Tv" on your camera) or manual mode ("M"). It is obvious that darkness will allow you to take slower shots, but if you want to do a long exposure in the daylight, you can decrease your ISO to 100 and increase your f-stop to f/16 or higher to create a small aperture.
You can also experiment with a slow sync flash which will freeze your subject with the fire of the flash, but create a ghosting effect with a longer shutter speed if a) you shake the camera around b) you twist the camera quickly in a circle c) you zoom in or out d) the subject itself moves. In theory slow sync flash effects will work better with an off-camera flash, but it can be done with the flash on your camera, too.
here is an example of a) shake the camera around:
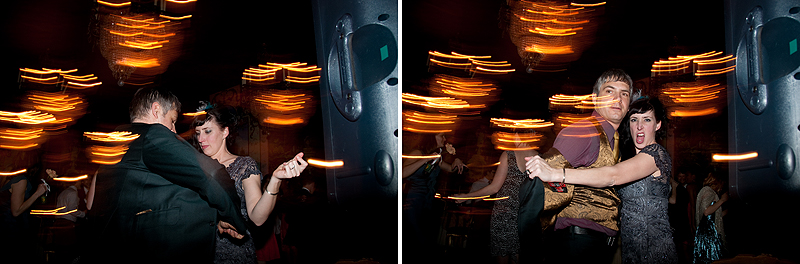
here is an example of b)you twist the camera quickly in a circle as you depress the shutter button:
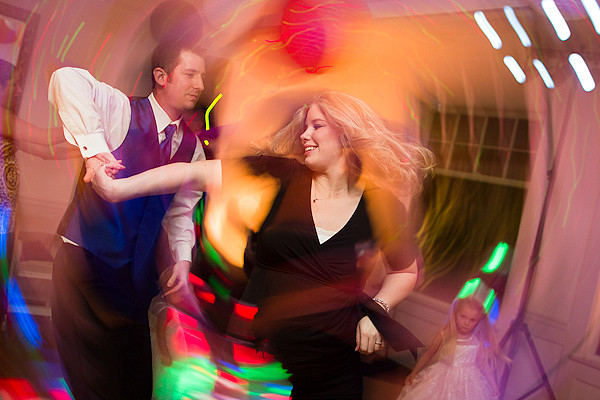
here is an example of c) zooming in or out:
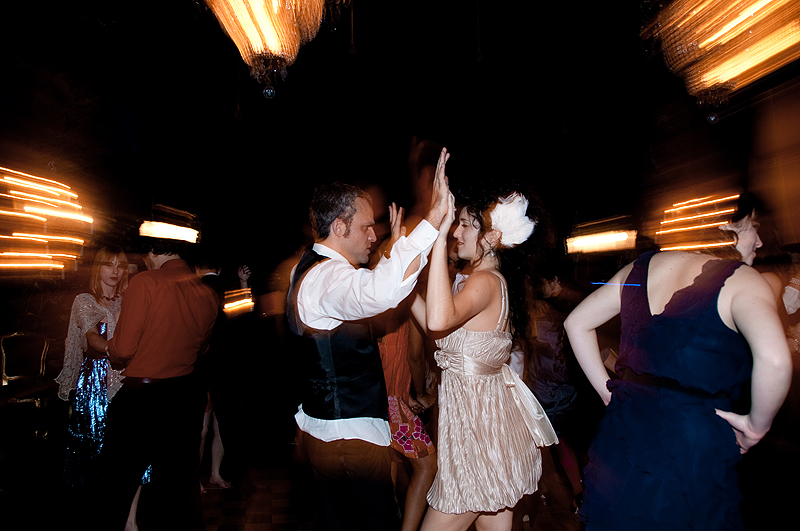
you can also pan the camera along with the object that is moving - you can do this by physically moving your body with the motion of the object (this will be familiar if you think of photos of car ads - the car is clear, but the road is often blurry)
there are some really fantastic examples of motion blur here - one of them is done without any special camera settings but just on perhaps something like a merry go round in the photo of the teddy bear
shawna had a great photo this week that demonstrates bokeh:
if you don't have a prime lens, you can do the alternate challenge which is a "long exposure," - or maybe i should have rephrased it to be "motion blur." a long exposure can certainly help you take a properly exposed image in dark situations with static objects, but if you add an element of movement to the image it can create a cool effect - like the fluidity of a waterfall, the movement of car lights at night, etc. It will help to have a tripod or some sort of flat surface to rest the camera on - I never carry a tripod around with me, but I took this shot resting the camera on a ledge.
here is some information on how to capture motion blur, including slowing down your shutter speed, stabilizing your camera on a tripod or on a table, choosing shutter priority mode (either "S" or "Tv" on your camera) or manual mode ("M"). It is obvious that darkness will allow you to take slower shots, but if you want to do a long exposure in the daylight, you can decrease your ISO to 100 and increase your f-stop to f/16 or higher to create a small aperture.
You can also experiment with a slow sync flash which will freeze your subject with the fire of the flash, but create a ghosting effect with a longer shutter speed if a) you shake the camera around b) you twist the camera quickly in a circle c) you zoom in or out d) the subject itself moves. In theory slow sync flash effects will work better with an off-camera flash, but it can be done with the flash on your camera, too.
here is an example of a) shake the camera around:
here is an example of b)you twist the camera quickly in a circle as you depress the shutter button:
here is an example of c) zooming in or out:
you can also pan the camera along with the object that is moving - you can do this by physically moving your body with the motion of the object (this will be familiar if you think of photos of car ads - the car is clear, but the road is often blurry)
there are some really fantastic examples of motion blur here - one of them is done without any special camera settings but just on perhaps something like a merry go round in the photo of the teddy bear
Subscribe to:
Posts (Atom)